In a world where Spotify, Netflix, Instagram, Airbnb, and more dominate the digital landscape with their React-built platforms, managing individual sign-ups can be overwhelming. That's where the convenience of a Gmail login option steps in, streamlining our experience and saving valuable time and energy.
React application is compatible with lots of open-source libraries. When it comes to authentication there are plenty of them but we can proceed with react-google-login
So, we'll discuss the steps to integrate the same in your react app.

Create Client Id for OAuth login from the developer console here - https://console.cloud.google.com/

Create the project with all the details.

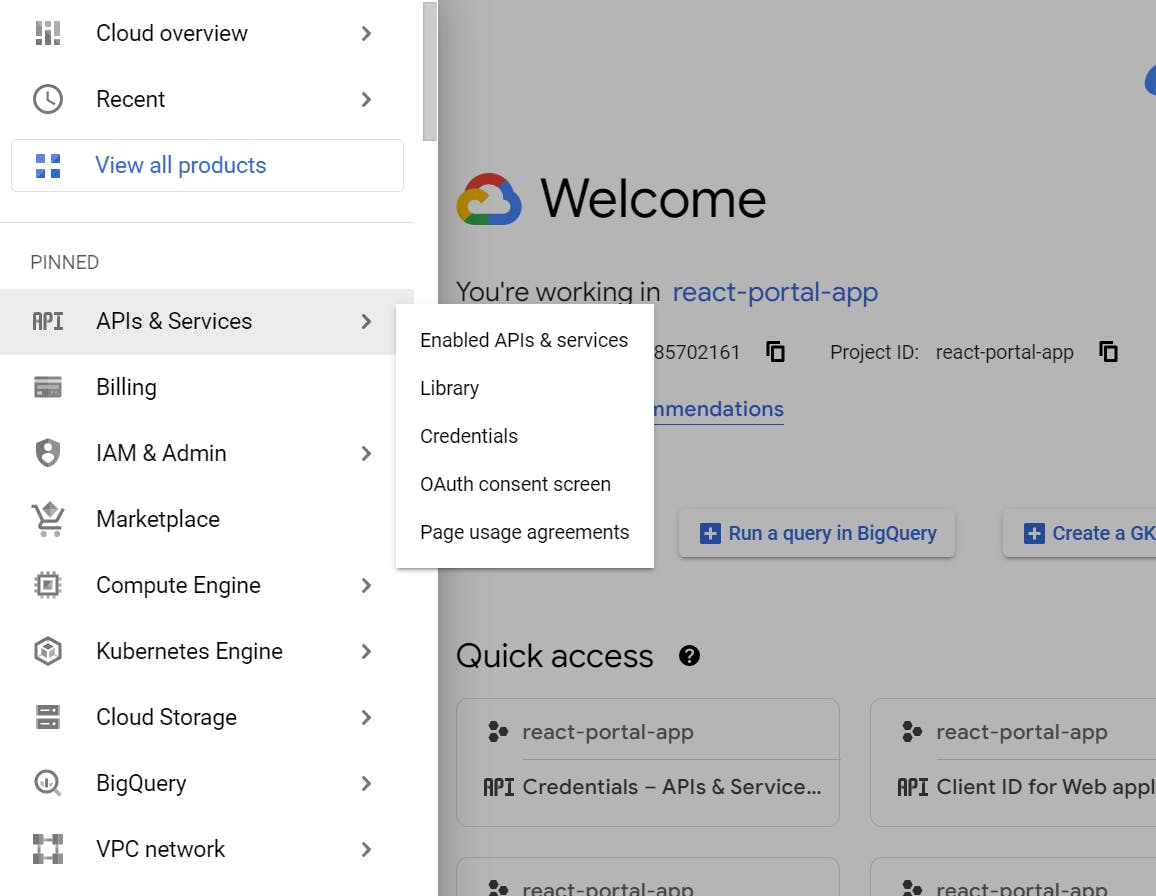
After that, select the created project. Now head towards the left sidebar menu and click on the APIs & Services > OAuth consent screen menu as shown below:

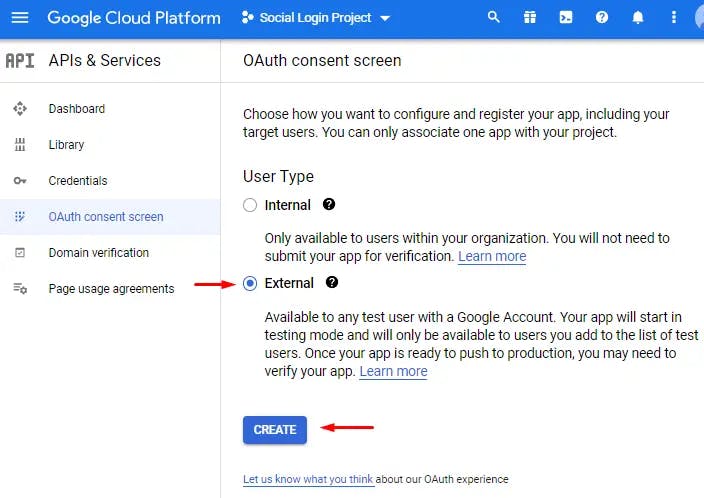
On the next screen, select the External radio option and hit create.

Fill up all the details as shown below and complete it further.

Now, open the left sidebar and select the OAuth option as mentioned.

7. Now, add the details as mentioned.

Now, you will abel to see the client Id that can be used in the component.
Once, you're done with this process, you need to create the React app with these steps.
Create the new app
npx create-react-app react-portal-appInstall the bootstrap library
npm install bootstrap --saveNow, install the react-google-login package that will provide the functionalities.
npm install react-google-loginCreate the google component under the src folder as - googlebutton.component.js and add the following code
 import React, { Component } from "react";
 import { GoogleLogin, GoogleLogout } from "react-google-login";

 // You have to replace this client ID as per your app from Google console
 const CLIENT_ID =
   "827529413912-celsdkun_YOUR_API_KEY_lsn28.apps.googleusercontent.com";

 class GoogleLoginComponent extends Component {
   constructor() {
     super();
     this.state = {
       isLoggedIn: false,
       userInfo: {
         name: "",
         emailId: "",
       },
     };
   }

   // Success Handler
   responseGoogleSuccess = (response) => {
     console.log();
     let userInfo = {
       name: response.profileObj.name,
       emailId: response.profileObj.email,
     };
     this.setState({ userInfo, isLoggedIn: true });
   };

   // Error Handler
   responseGoogleError = (response) => {
     console.log(response);
   };

   // Logout Session and Update State
   logout = (response) => {
     console.log(response);
     let userInfo = {
       name: "",
       emailId: "",
     };
     this.setState({ userInfo, isLoggedIn: false });
   };

   render() {
     return (
       <div className="row mt-5">
         <div className="col-md-12">
           {this.state.isLoggedIn ? (
             <div>
               <h1>Welcome, {this.state.userInfo.name}</h1>

               <GoogleLogout
                 clientId={CLIENT_ID}
                 buttonText={"Logout"}
                 onLogoutSuccess={this.logout}
               ></GoogleLogout>
             </div>
           ) : (
             <GoogleLogin
               clientId={CLIENT_ID}
               buttonText="Sign In with Google"
               onSuccess={this.responseGoogleSuccess}
               onFailure={this.responseGoogleError}
               isSignedIn={true}
               cookiePolicy={"single_host_origin"}
             />
           )}
         </div>
       </div>
     );
   }
 }
 export default GoogleLoginComponent;
This component will provide the google sign in and sign out options.
Add the selector of the component in your app.js file
 import { Component } from "react";
 import "./App.css";
 import "../node_modules/bootstrap/dist/css/bootstrap.min.css";
 import GoogleLoginComponent from "./googlebutton.component";

 class App extends Component {

   render() {
     return (
       <div className="App container">
         <h2>Welcome to React App!</h2>
         <GoogleLoginComponent />
       </div>
     );
   }
 }
 export default App;
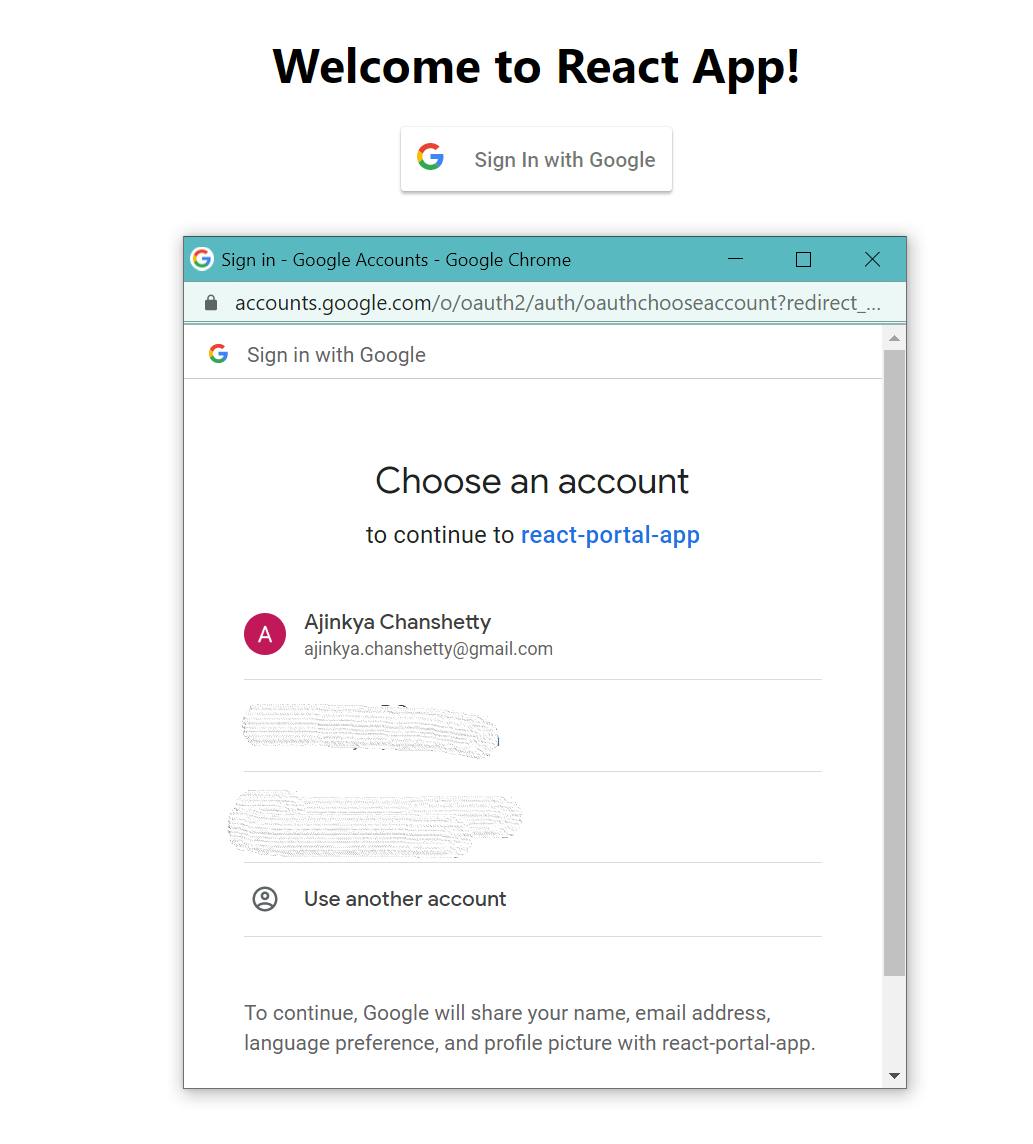
Finally, you can start the app with npm start and its Boom!

You have to be careful while mentioning your URLs in the OAuth configuration, sometimes it takes some time for the configuration at google API end. Once its done, you can start to explore the different parameters that comes in the response.
If you liked it then please share it and hit the like button because,
A person who feels appreciated will do more than expected! Happy coding :)
